MongoDB
How to Generate MONGO DB
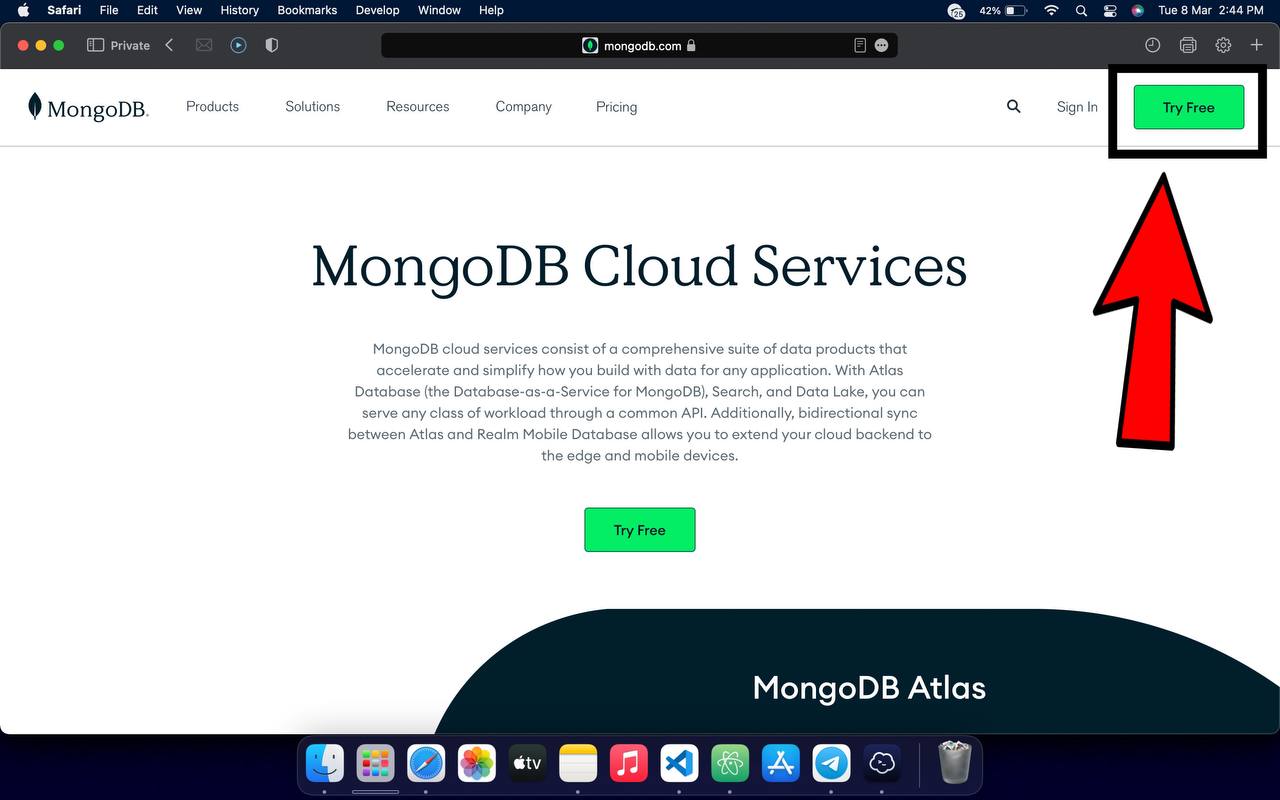
1. First, Go to cloud.mongodb.com then Sign Up there.
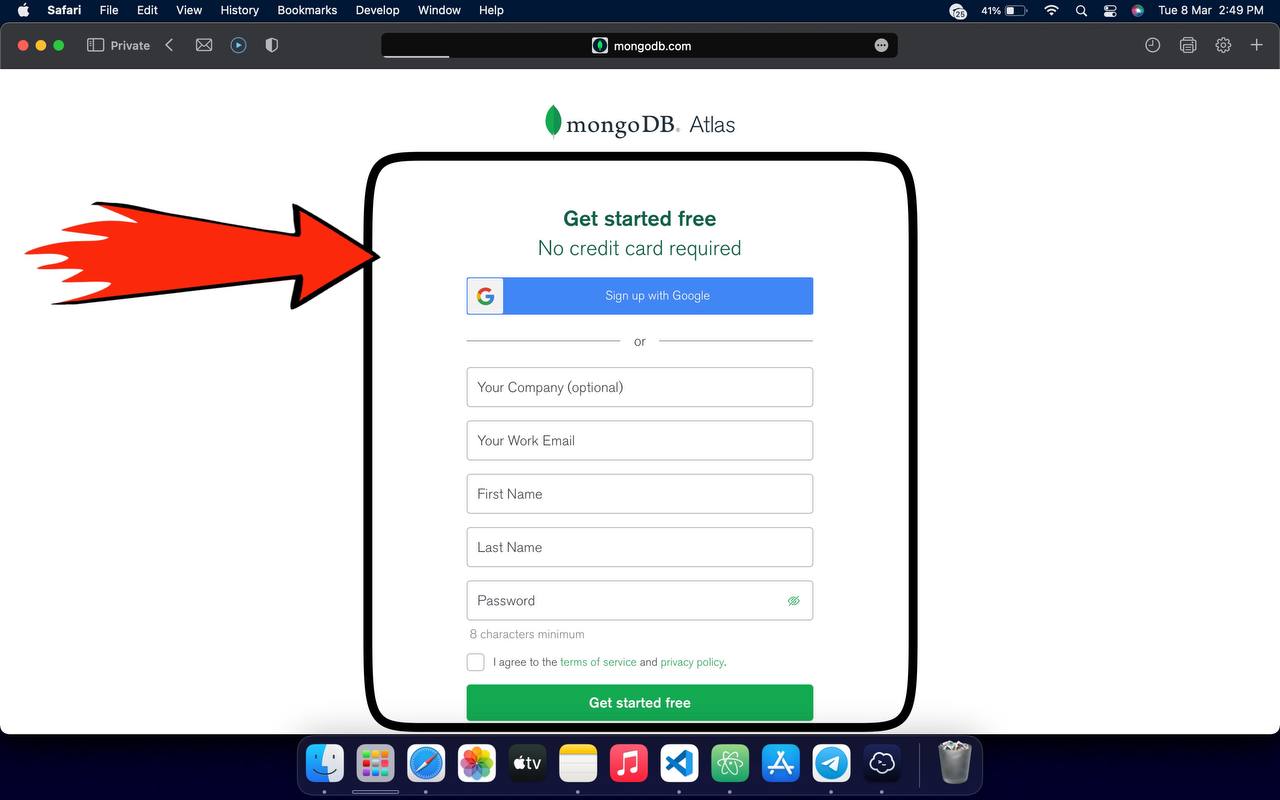
2. Login or Sign Up (Create an Account) there. If you don’t have an Account!
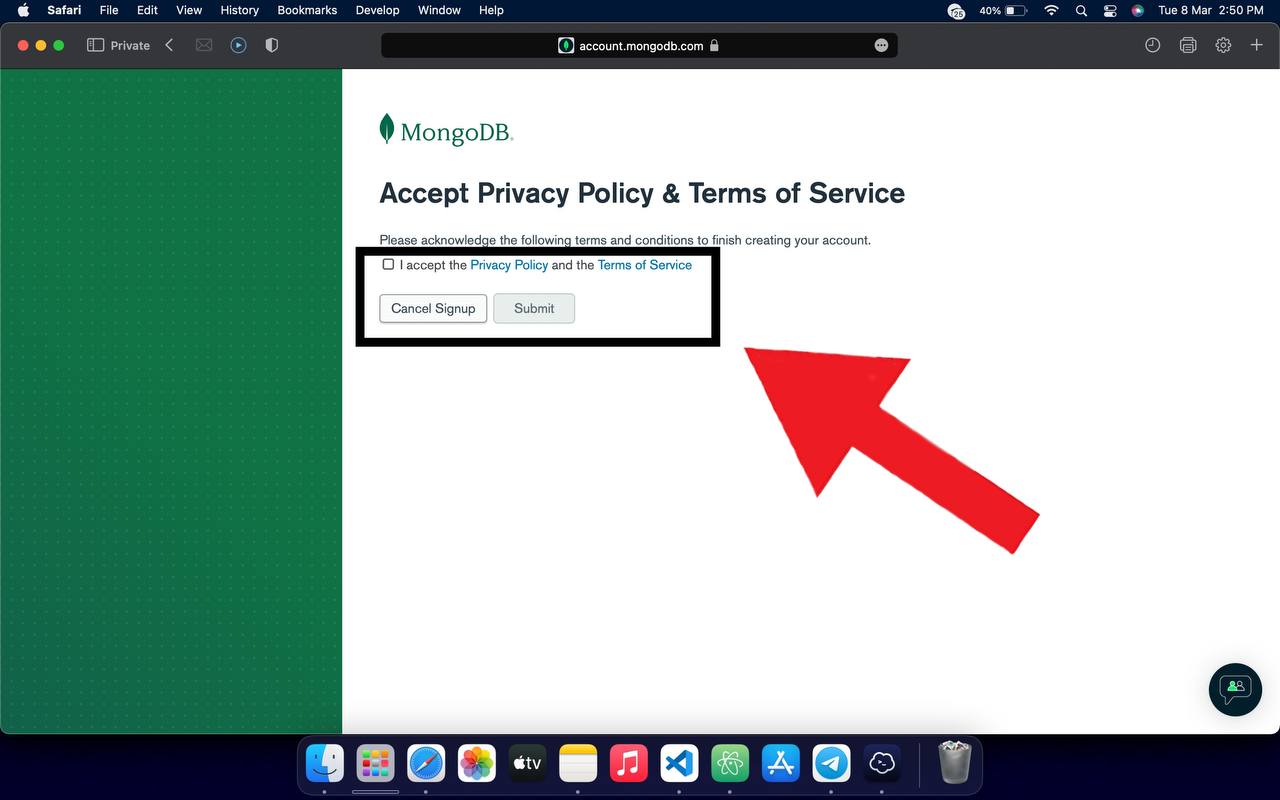
3. Accept the Privacy Policy and Terms of Service of Mongo DB
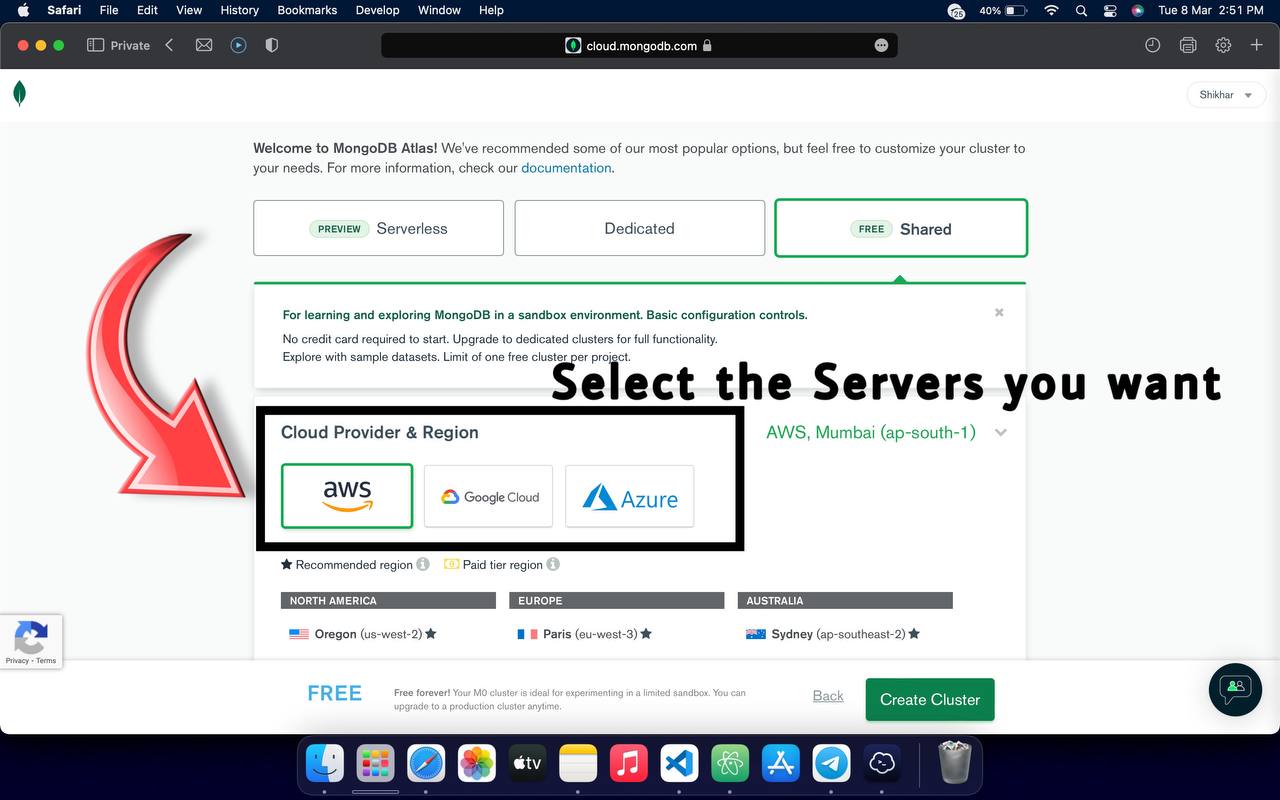
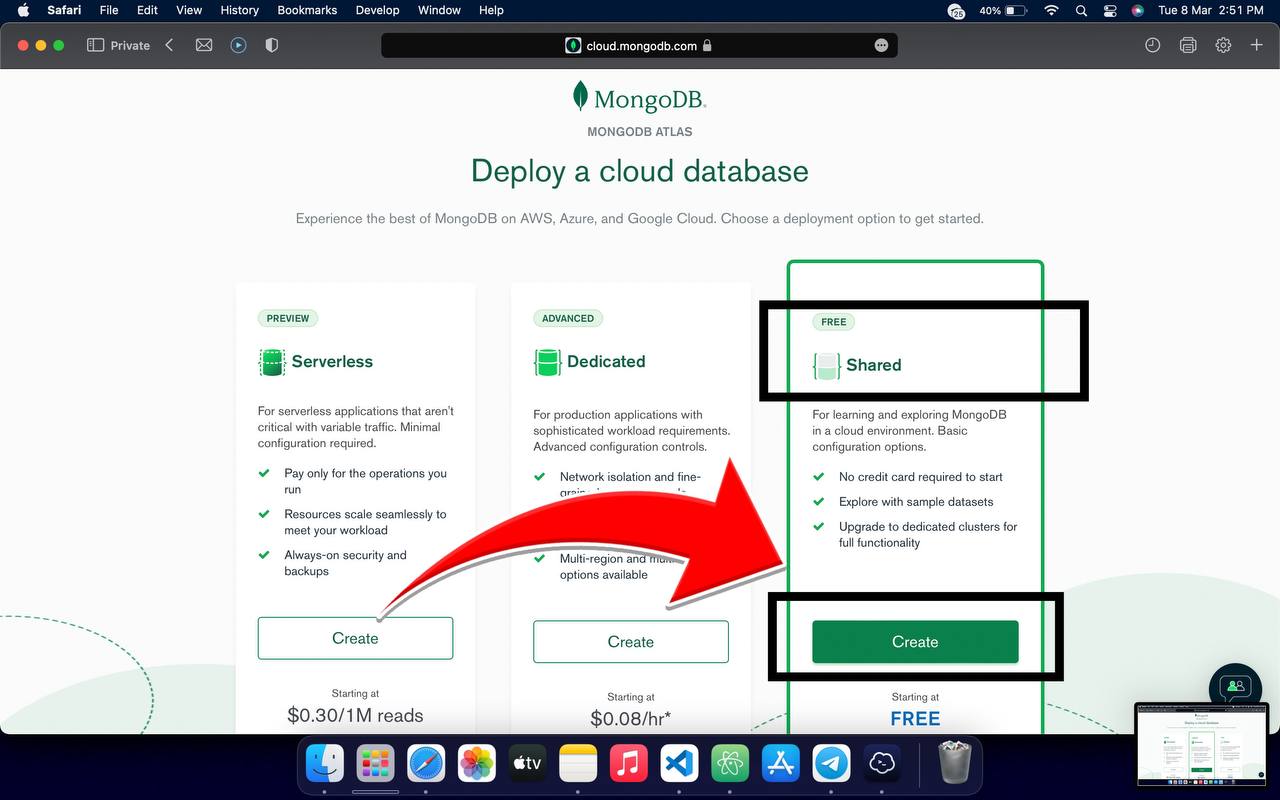
4. You'll see a deploy cloud database option. Please select Shared Hosting under Free Plan Here
5. Select the Region and Server. Where your Database server will host.
Select the server location nearby your location, So that it work fast and efficient.
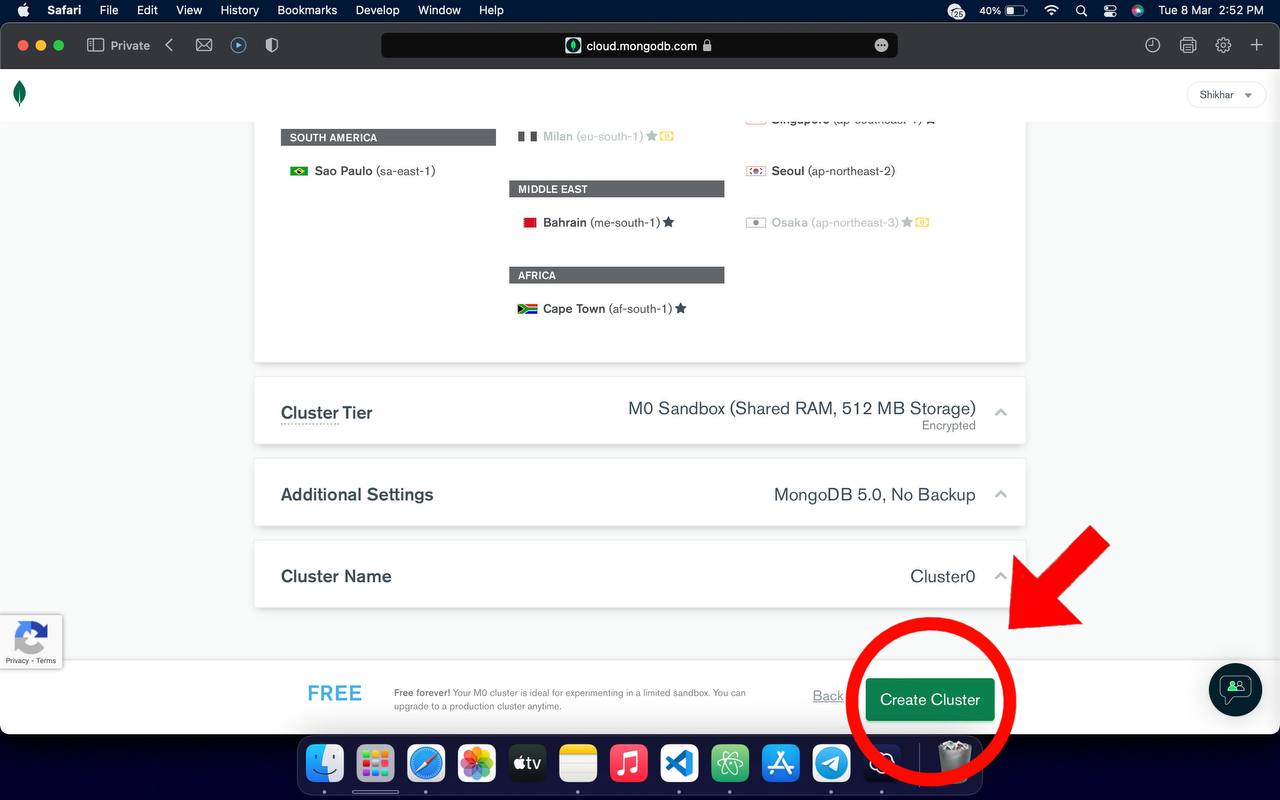
6. Click on Create Cluster Now.
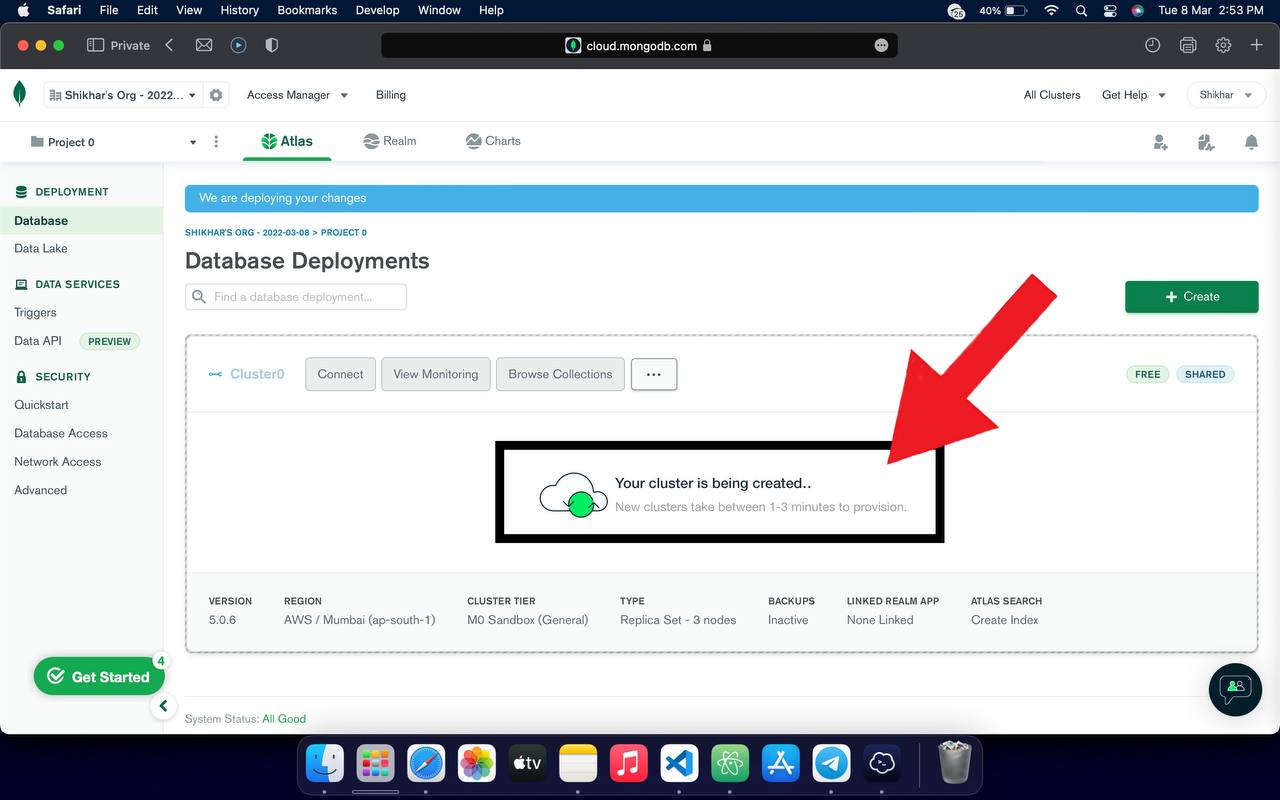
7. Your database cluster is being created now. It can take upto 2-3 mins. Till then we can set other settings.
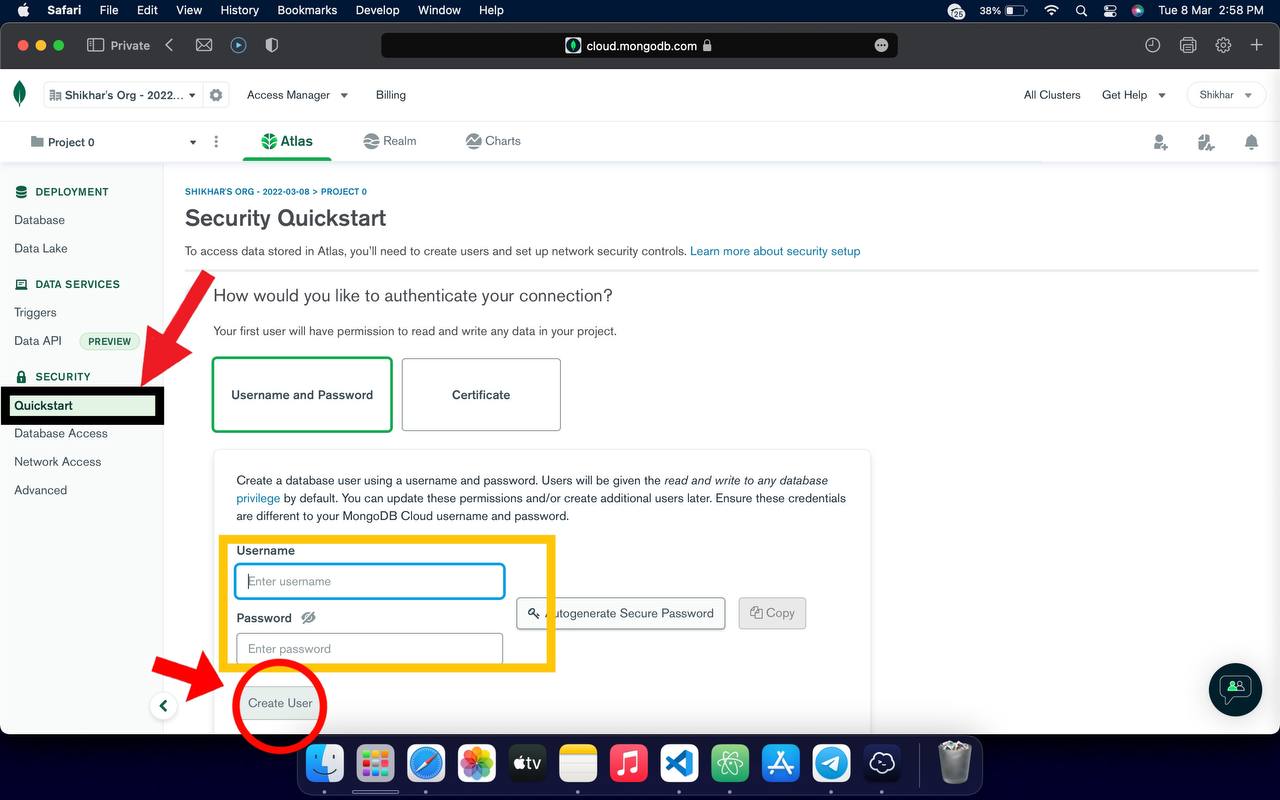
8. Click on QuickStart under security tab. Input any username and password there and press create user.
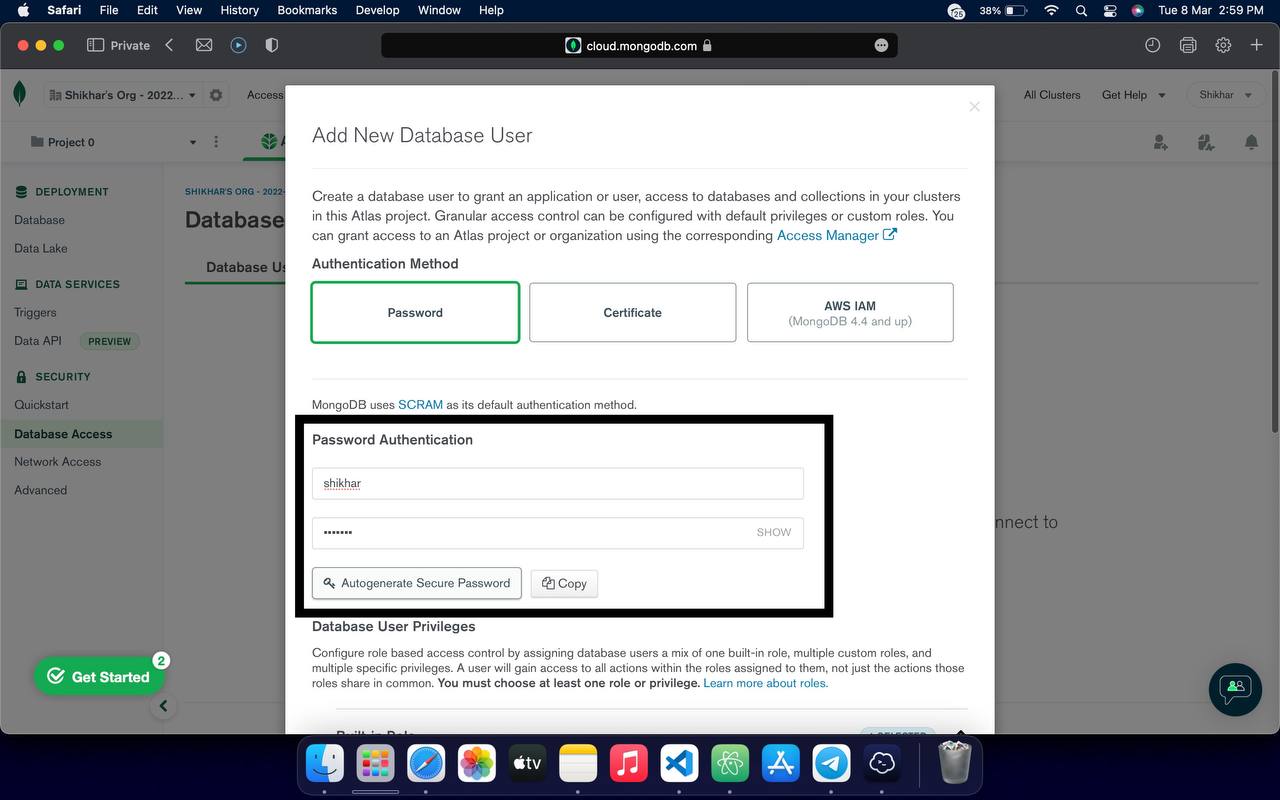
Don't use any special character in your username or password like !@#$% etc... Make it simple
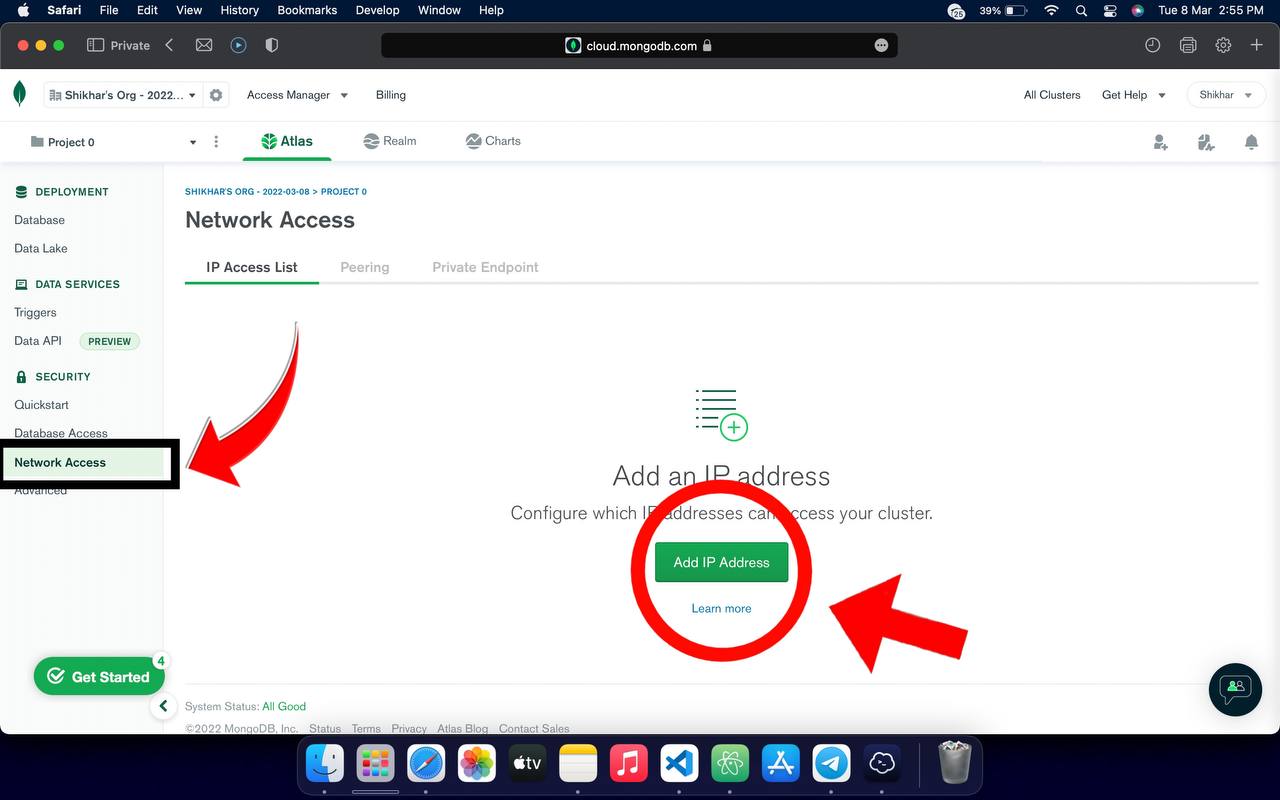
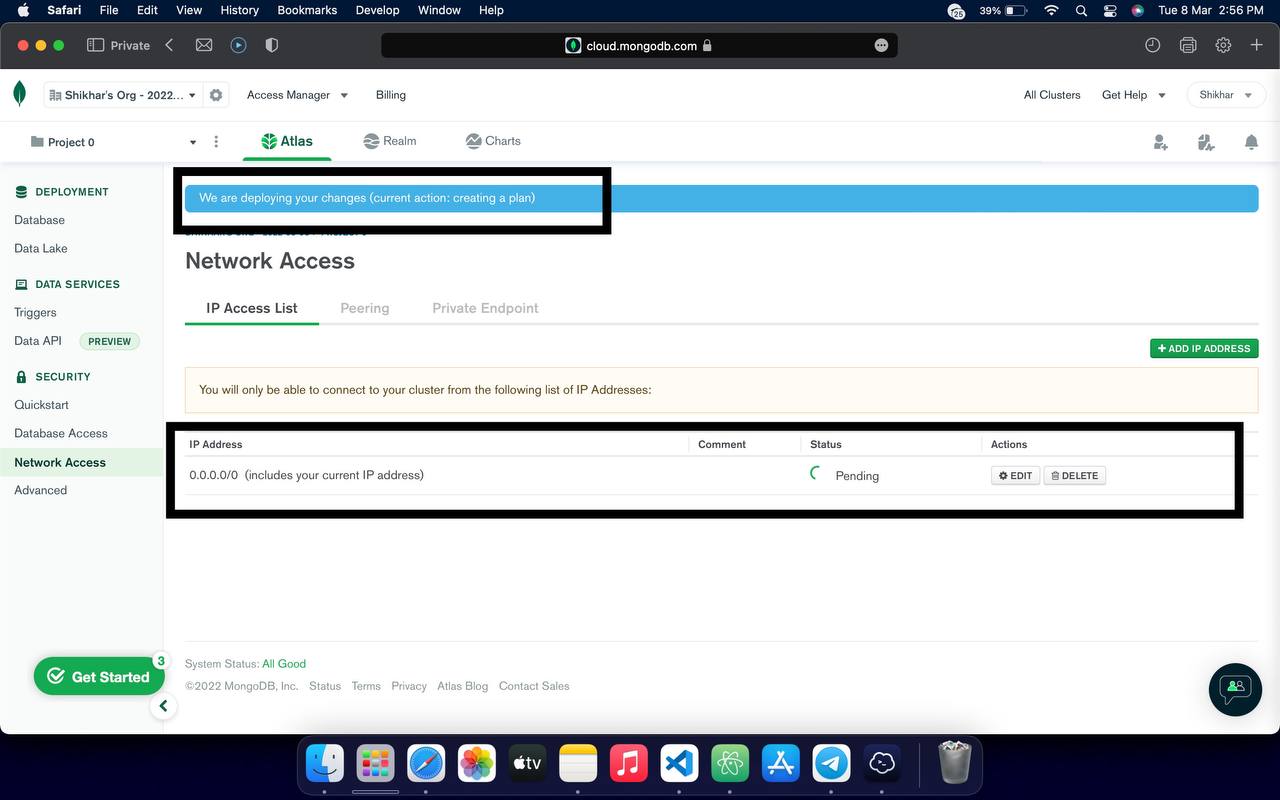
9. Click on Network Access under security tab. Click on Add IP Address
10. Click on ALLOW ACCESS FROM ANYWHERE and make sure its 0.0.0.0/0 and click Confirm
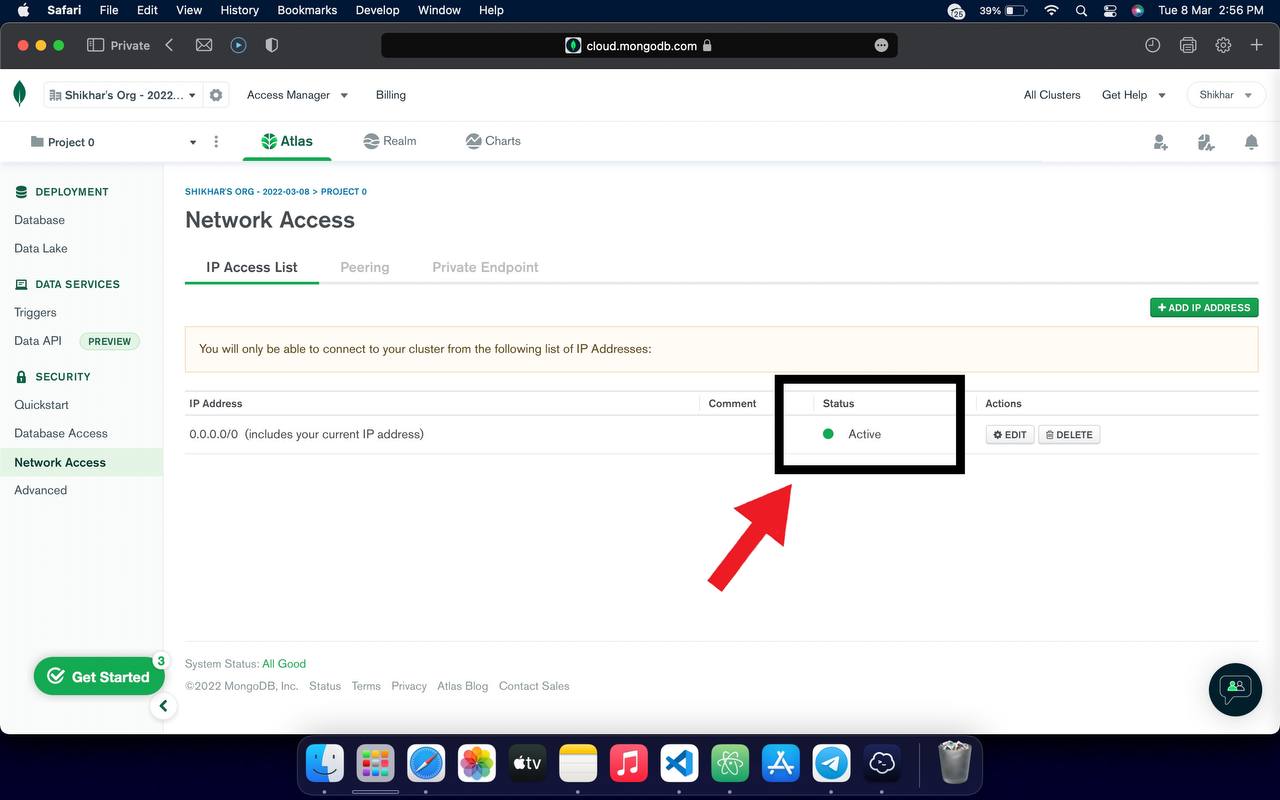
11. Wait for 1-2 Mins till it deploys your changes. Makes sure Pending Status turns to Active thereafter.
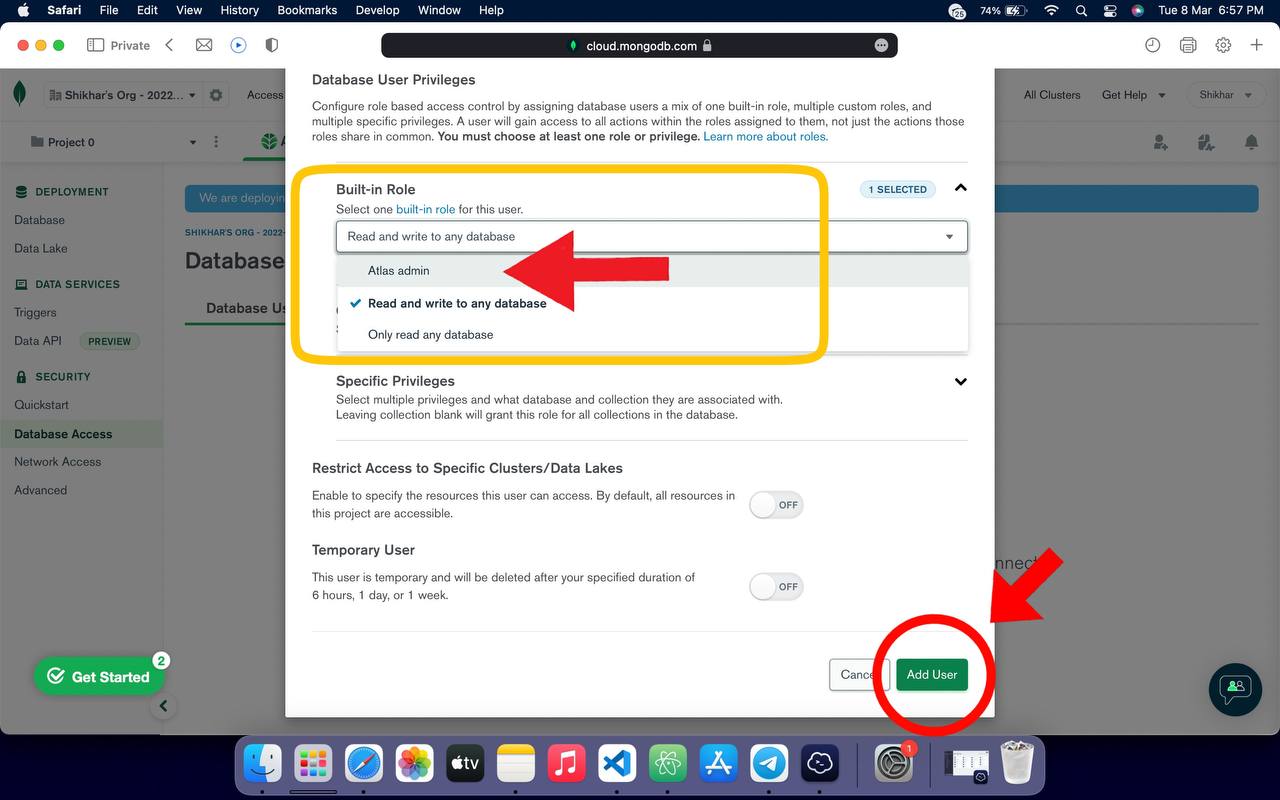
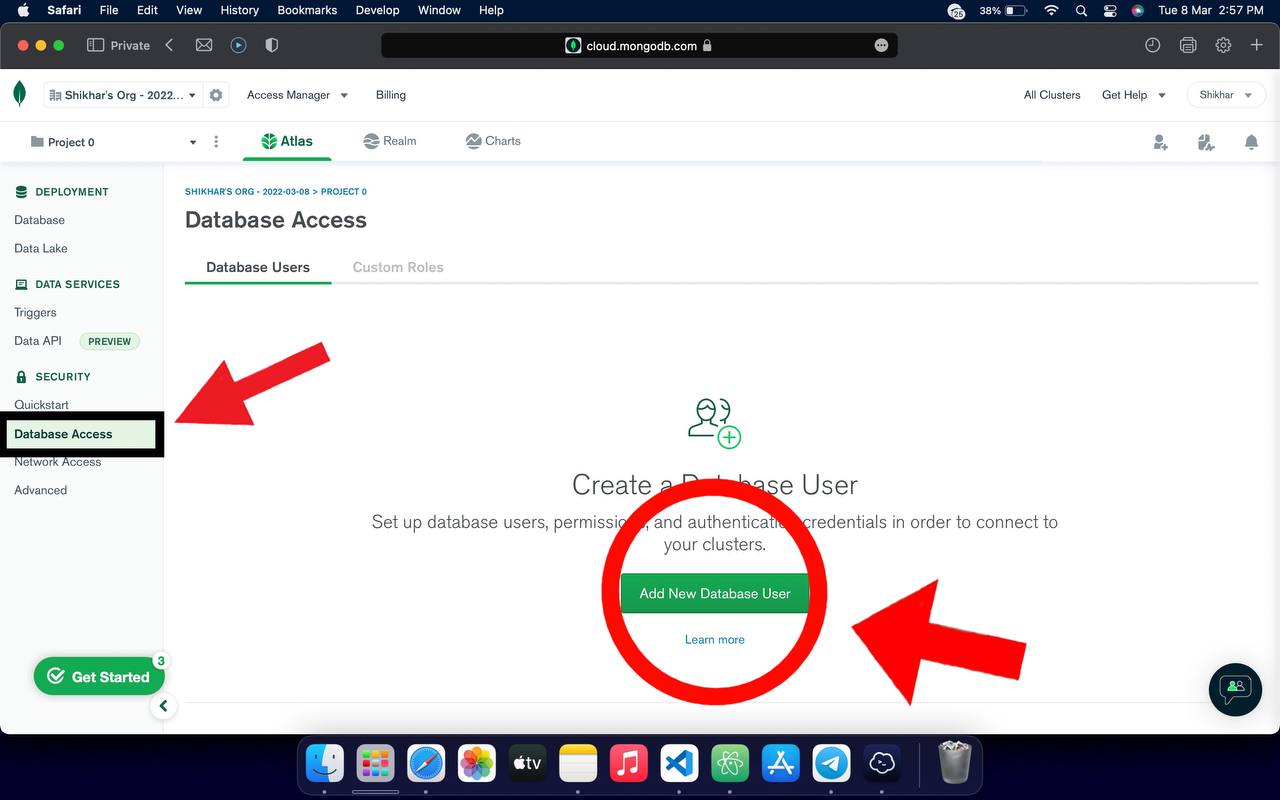
12. Click on Database Access under security tab and then click on ADD NEW DATABASE USER
13. Input the same Username and Password you used while creating a user in step number 8.
14. Scroll down the menu and find BUILT-IN-ROLE . Edit the role to Atlas Admin there and hit Add User
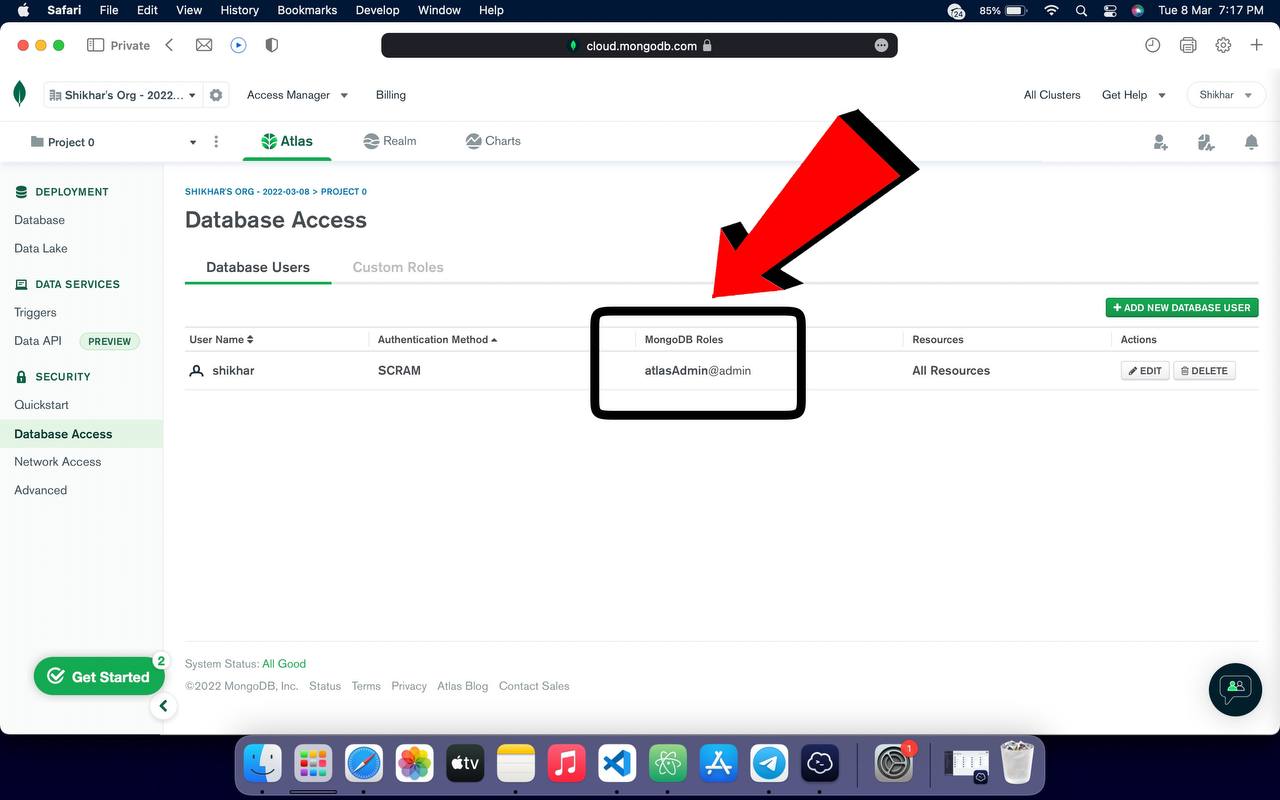
15. Now make sure database user has been added and its role is atlasAdmin@admin
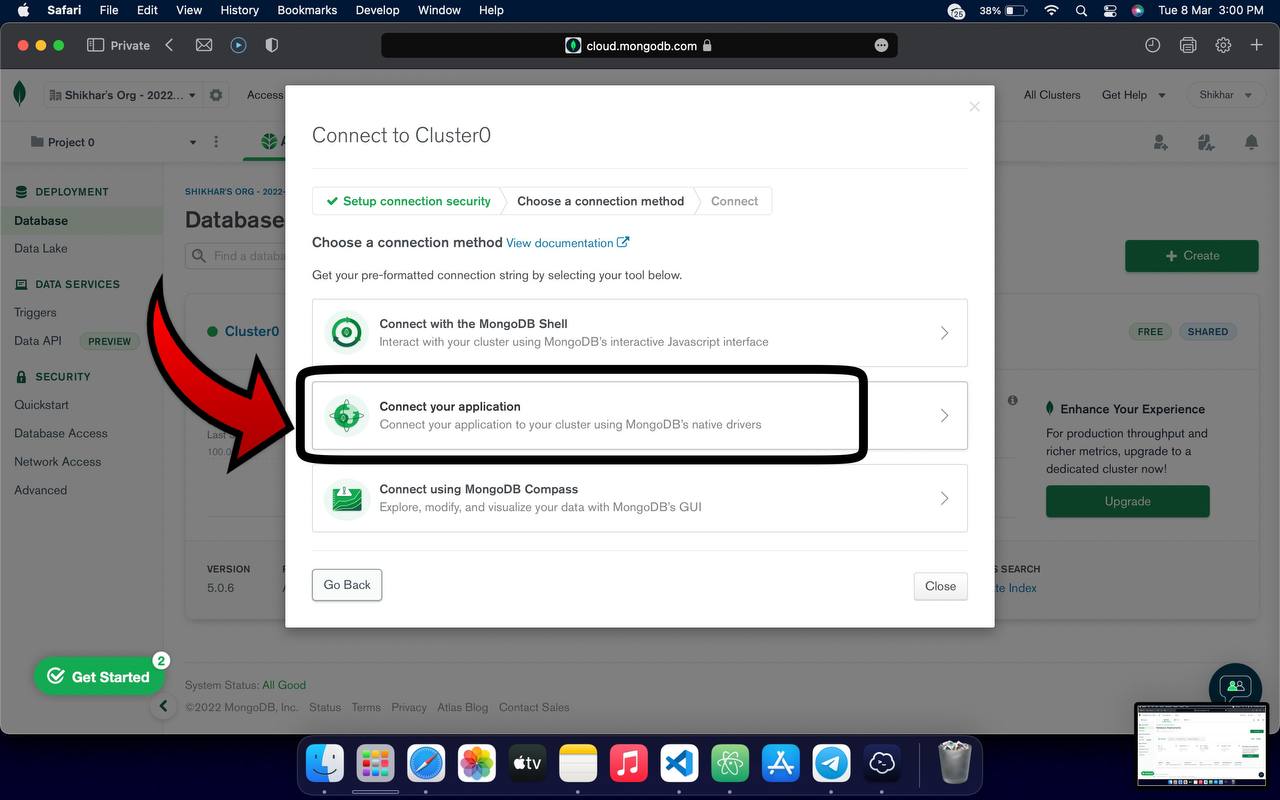
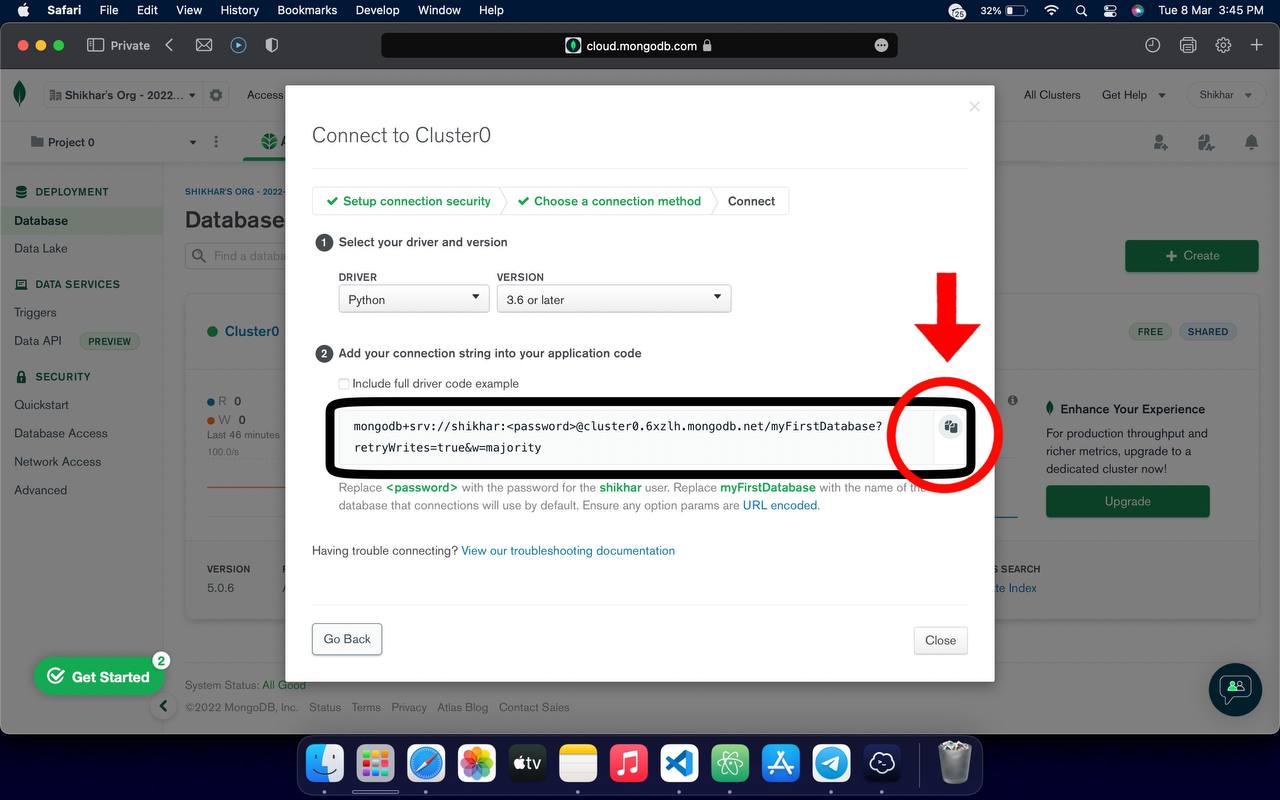
16. We have successfully configured Mongo Db now. Its time to connect it. Goto Database section and click on connect.
17. Click on CONNECT YOUR APPLICATION
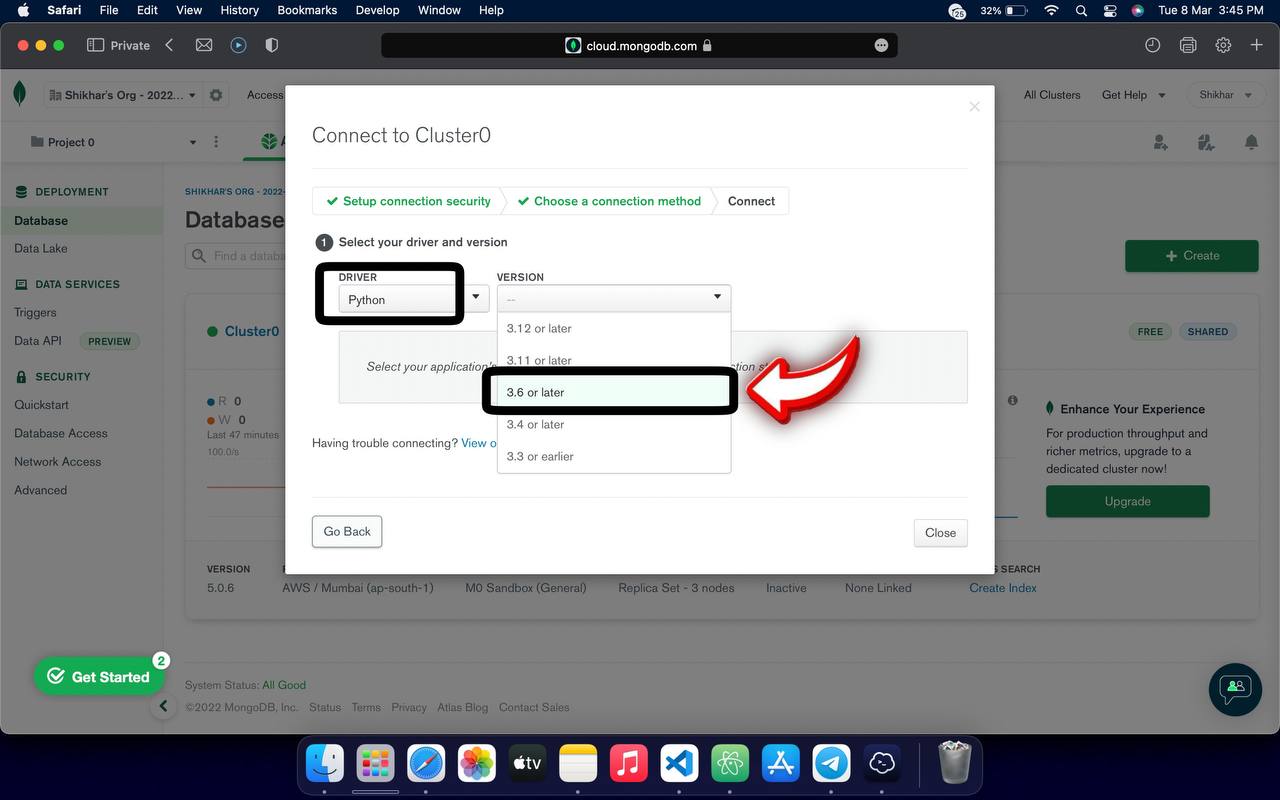
18. Select Driver as PYTHON and version as 3.6 OR LATER
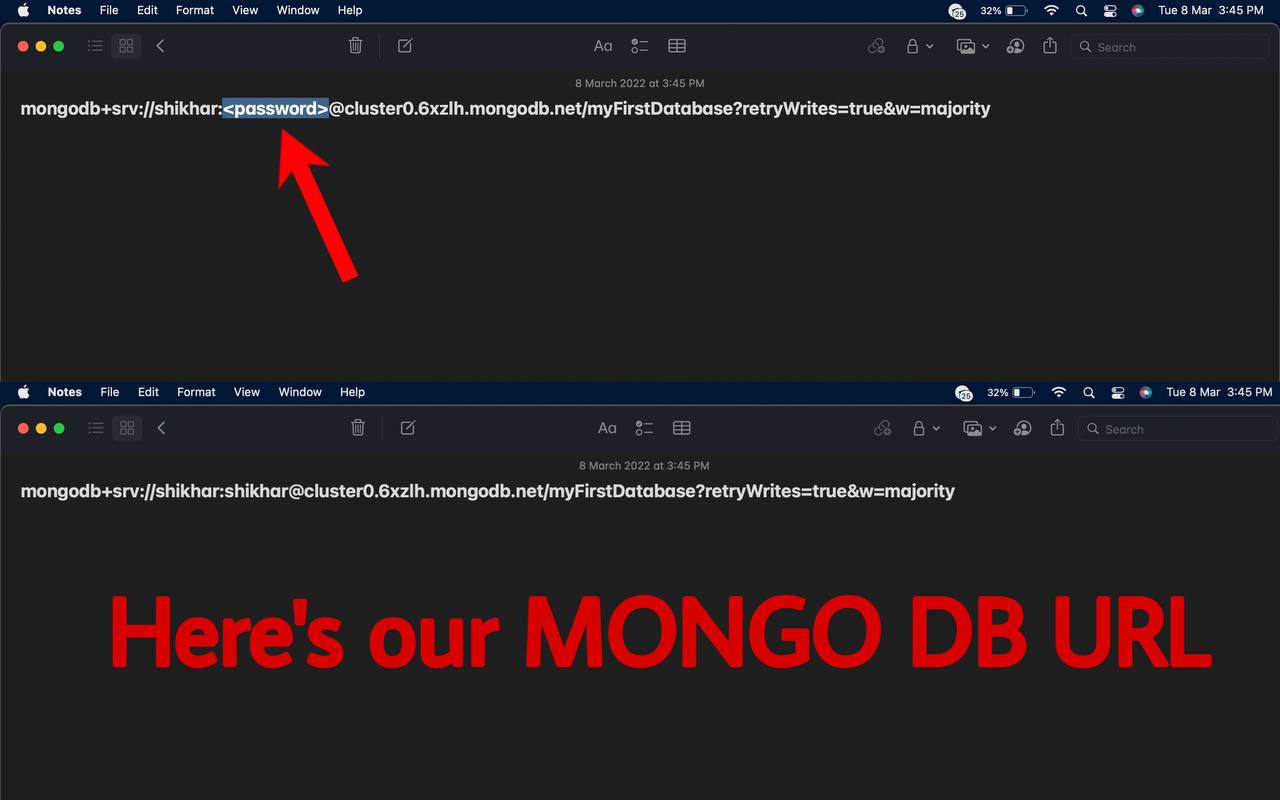
19. We have succesfully got our MONGO DB URL now. Replace <password> with your password and use it.
<password> with your password and use it.20. Replace your <password> with the password you used to create user in step 8.
<password> with the password you used to create user in step 8.Last updated